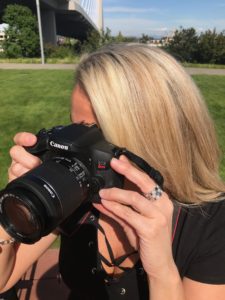
Snap with the Canonand feel the camera vibe! This beautiful Canon EOS T6i has joinedthe BLENDstyles family and expedition. Prior, to the canon I consistentlysnapped photos from my I-phone because the pictures were clear and easy to upload to different social media outlets.. However,when I started blogging I wanted to make sure to have a good camera to shoot professional images. I did alot of research and read up on several different cameras and the Canon EOS Rebel T6i DSLR seemed to fit what I was looking for.
First, I reallyhad an interest inWi-Fi so it would be easy to upload to social media! This camera has the latest and greatest Wi-Fi function. This means once you shoot the photo it takes no more than 30-seconds to connect to Wi-Fi and transfer to your selected electronic device. In my case, I wanted to transfer from the camera to my I-phone Plus. If you have purchased this camera follow the below steps to connect to Wi-Fi andupload printstoyour I-phone.
Go to the app store and search the canon camera connect application.
- Go to the T6I camera, click menu, scroll right until you see an optionlabeled Wi-Fi NFC. Click on disable to enable and click set.
- The first time you will be required to create a camera nickname. Essentially this will be the Wi-Fi Name.
- Go to Wi-Fi function. There will be several device options to select. However, in this case select smartphone.
- Select Camera Access Point Mode and click OK.
- You will want to keep it on network settings easy-connection. This will be your SSID which will be your connection.
- Go to your phone and select settings and Wi-Fi. Select your nickname and enter the encryption key as the password and click join.
- Go back to the canon app on your phone and you can see Wi-Fi connected.
- On the camera it will ask if it’s okay toaccess. Click OK. It will say connection established.
- Go back to the phone application and you will see your photos.
- From there you can download to your phone or use photo sharing.
Wi-Fi makes photos easy to exchange between several different compatible devices. Also, wanted to mention this feature works with both Android and IOS.
Second, I love the touchscreenwith this camera, it’s extremely user friendly with a quick tap of the screen. In addition, there is a swing-out touchscreen monitorthat allows for quick setting adjustments. The best feature to the touchscreen is the ability to zoom or change the photos. I use the swing-out monitor to review photos immediately after shooting.
Lastly, the image settings are a bit tricky but confident you will get it. They say practice makes perfect, right? In the beginning, make sure to play around with the settings in different lighting atmospheres. This will help you master the camerasettingsin a variety of lightingenvironments. If you are like me and love the slight blur look then these tips will help! This camera has the F5.6 so adjust theF-Stopto the lowestcamera setting. Typically, I will shoot with the 55m which is the focal point, and you want to make sure the ISO settingsare compatible with the lighting. For example, clear sky, cloudy, indoor, and outdoor. The ISO does make a difference when shooting.
I’m still learning the benefits of the camera and as time goes on I will share more details. Stay tuned.
Finally,I’m extremely pleased with this purchase and you can find it here >Canon.
I hope this post was valuable if you’re a new blogger or new to the advanced camera world!
BLENDstyles
xoxo